Looking for help?
How do I adjust a Summit Collar?
Our Summit Collars use a double-pass adjustment. This double-pass keeps the adjustment from slipping and allows for more available space on customized collars. However, the extra layer of webbing used makes the adjustment more difficult and requires that you follow these instructions:
To Tighten the Collar:
Step 1:
Feed the outer layer of webbing through the adjustment slide HALF of the distance desired to shorten.
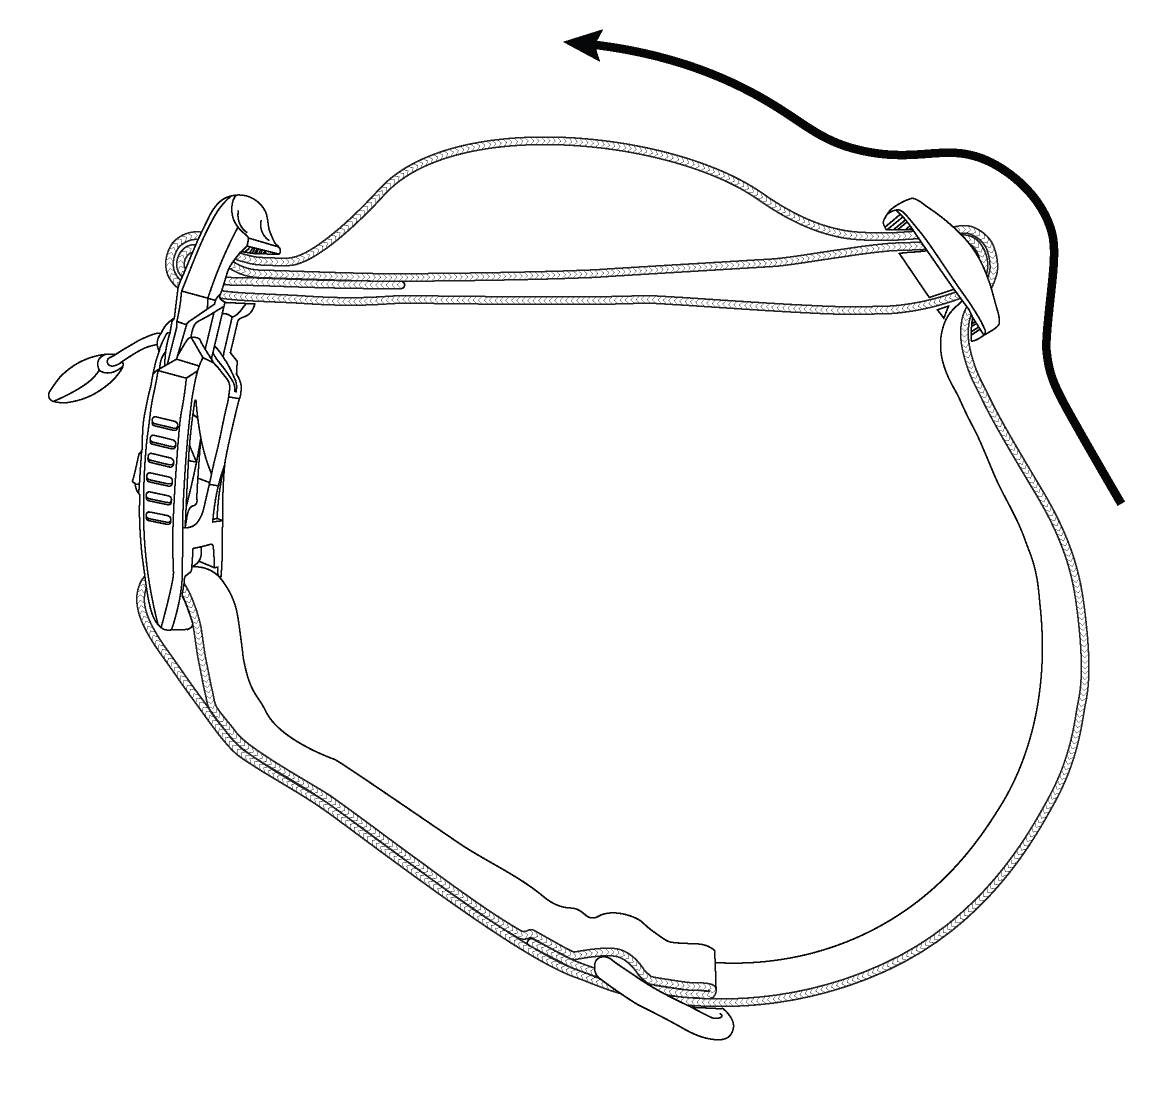
Tip:
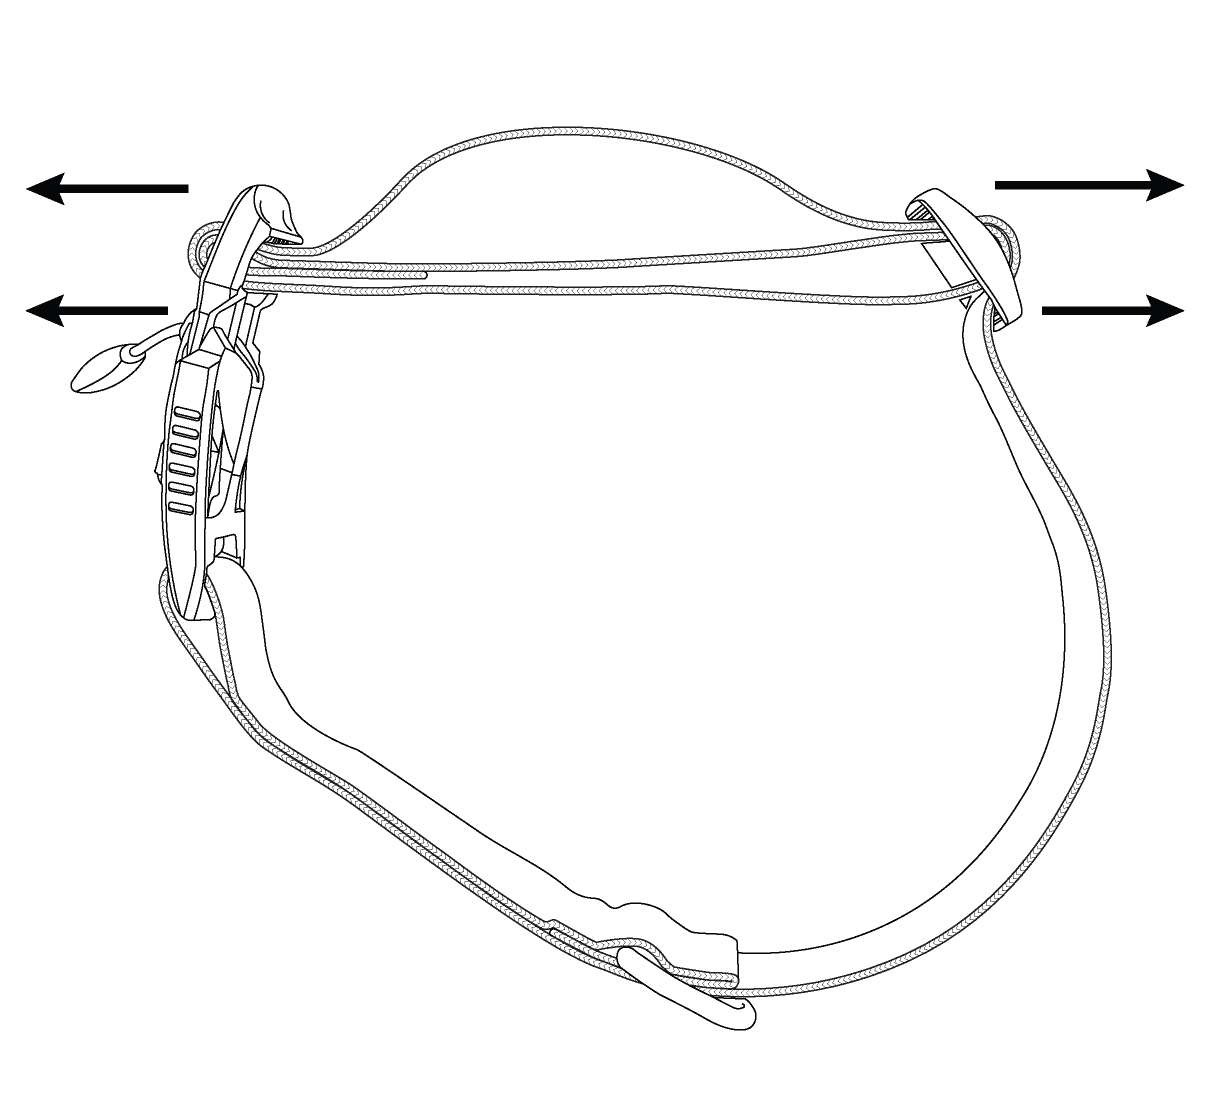
Hold the plastic adjustment slide in one hand (without obstructing the webbing) and with the other hand pull up on the outermost layer of webbing (where the arrow point is on the above illustration) until the adjustment slide is in the desired position.
Step 2:
Feed the slack (created in step 1) through the adjustment buckle. Note that only the outermost layer of webbing should form a loop.
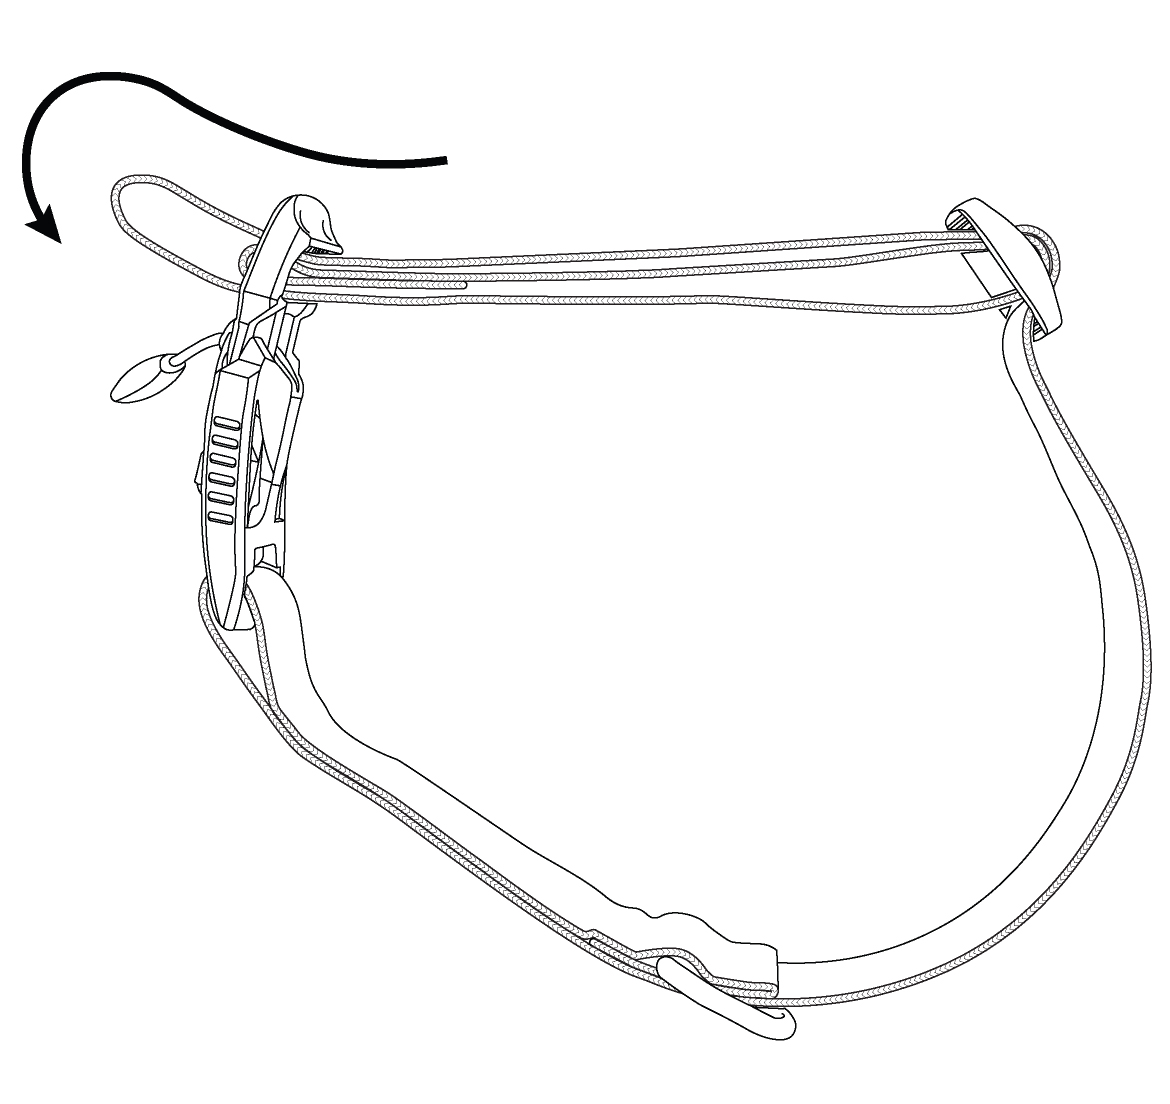
Tip:
Pinch the webbing close to the buckle (near the tail of the arrow in the above illustration) and push outward, while wiggling, to get the loop started (where the arrow point is on the above illustration).
Step 3:
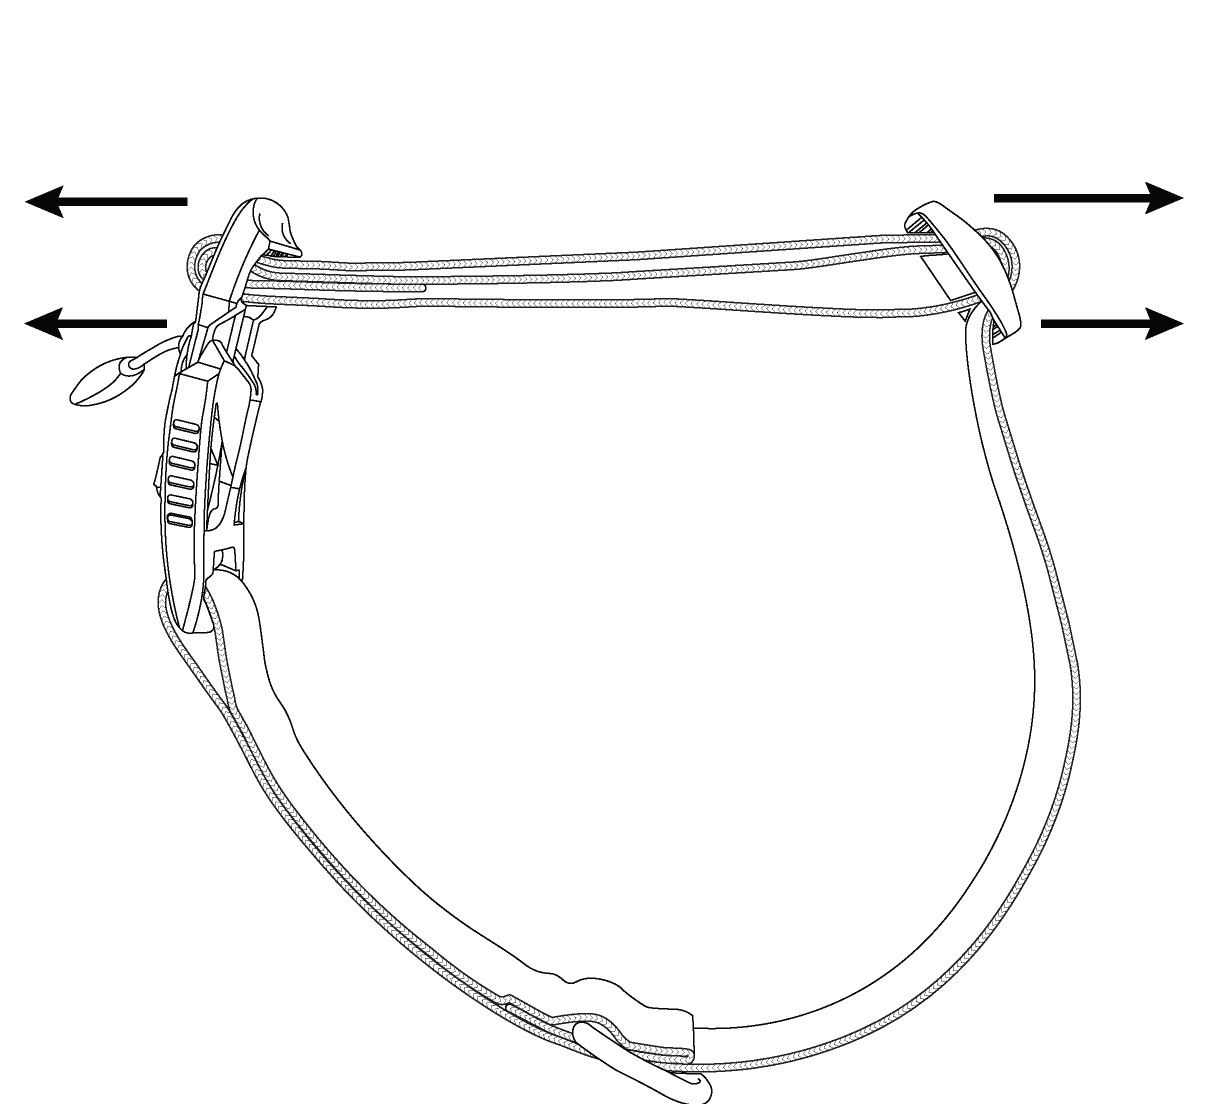
Hold the buckle in one hand and the plastic adjustment slide in the other hand (without obstructing the webbing in either hand). Pull both hands until the webbing is taut.
Suggestion:
If further adjustments need to be made, sometimes adjusting out (loosening) is easier.
To Loosen the Collar:
Step 1:
Feed the bottom layer of webbing through the buckle the total amount desired to lengthen.
Tip:
Hold the buckle in one hand (without obstructing the webbing) and with the other hand pull up on the outermost layer of webbing (where the arrow point is on the above illustration) until the desired amount of webbing is pulled. Note this will form an arch on the outer and middle pieces of webbing.
Step 2:
Hold the buckle in one hand and the plastic adjustment slide in the other hand (without obstructing the webbing in either hand). Pull both hands until the middle webbing is taut.
Note:
The outer layer of webbing will still have an arch.
Step 3:
Feed the outer layer of webbing through the plastic adjustment slide until taut.

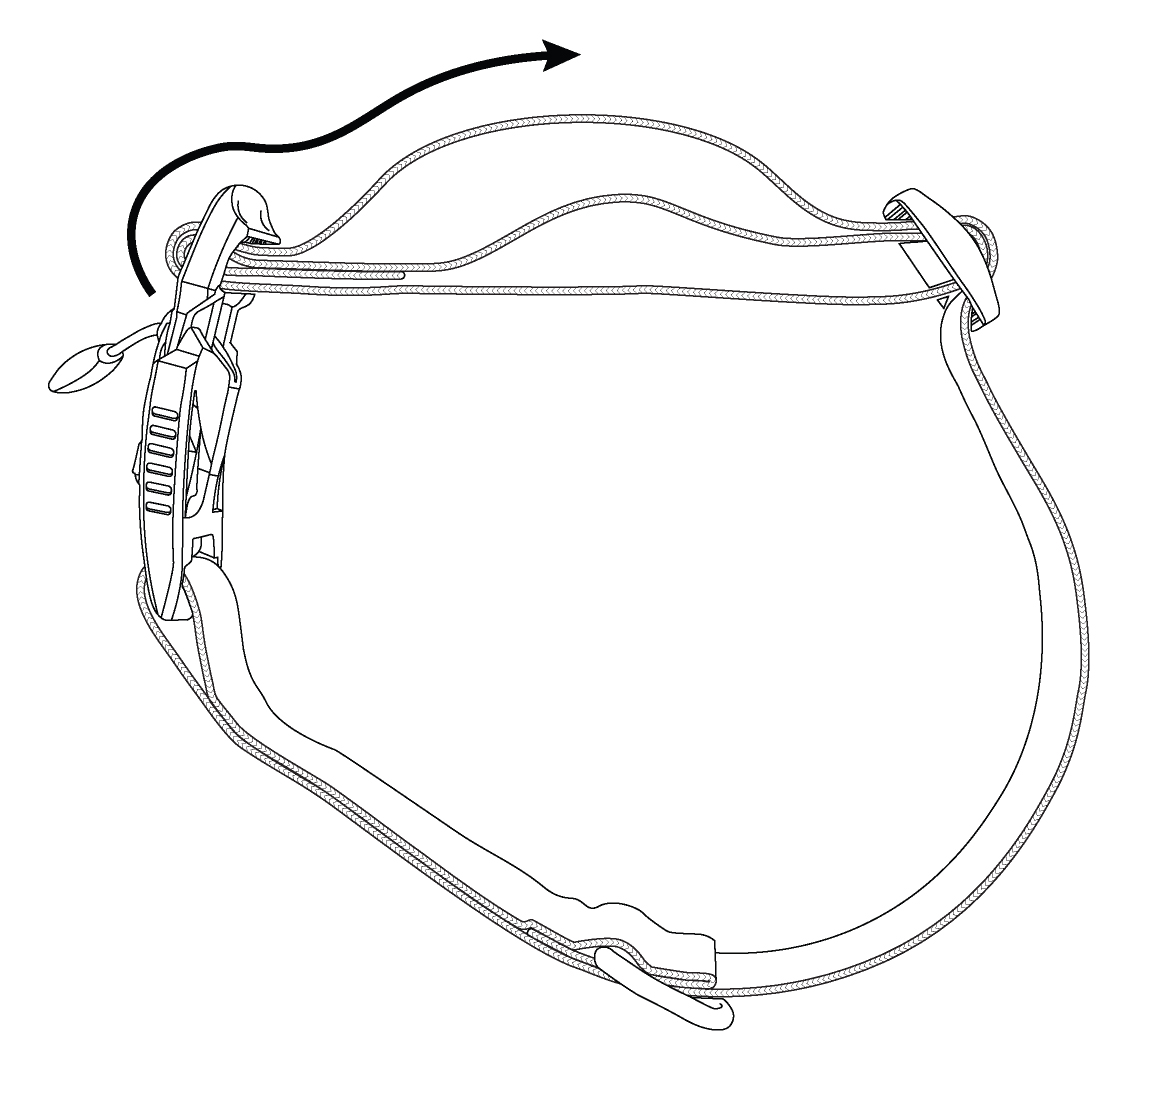
Tip:
Hold the plastic adjustment slide in one hand (without obstructing the webbing). Pull the single layer of webbing (on the right, d-ring, side — where the arrow point is on the above illustration) until the outer webbing is taut.
You can download a printable PDF of these instructions using this link.
Attaching the Collar:
For 1.5″ Summit Collars we recommend keeping a few fingers between the hook and loop on the inner webbing, so that it does not connect. You will attach the buckle, then slide the inner webbing outward (this creates tension on the outer webbing). You can then connect the hook and loop of the inner webbing to maintain this tension.
Fitment:
Ideally you want a collar to be snug, but loose enough that you can get two fingers underneath (your fingers should be side by side, as if taking a pulse).